 Schedule it. Automate it. Leveraging this function enables a coder to expand what they can accomplish with scripting in an environment. PowerShell scripts can do this with the Windows Scheduler if desired. When setting up a schedule for a script to run, choosing some advanced options may allow a script to run in a more reliable manner.
However, when scheduling a script for a production process, there are some considerations that should be made prior.
Planning steps
1) Run a Scheduled Task for the script in a test environment
Testing a script prior to putting it into production may seem rather elementary, but what about testing the script in a scheduled fashion to make sure the script runs when scheduled? These two actions are not one in the same. A scheduled task may run under a different login account, on a different server, may not have the same PS modules present, etc. So doing a test run of the script by using the Windows scheduler is important and may reveal some weaknesses of the script and / or process.
2) Adding notifications or alerting for script steps
Alerting may be a feature that is needed for your scheduled script. Custom ‘alerts’ could take the form of an email to an IT Group or an Event written to the server’s event logs. Adding an email confirmation at the end of a script, especially for testing, could prove quite useful. A missed email would signify the script failed whereas an email sent may provide proof of success.
3) Add Log files for tracking script actions
With complicated and automated scripts, having a log of actions taken, errors experienced, etc should be utilized. This will enable troubleshooting and or auditing of a script run. Auditing with a log file will also provide ample data for proofing our a conceptual script. Possibly logging all success and failure. 4) Avoiding some cmdlets There are some cmdlets that are best left to an interactive experience as they may require a user to review the output or to enter some information. Cmdlets like these are listed below (not meant to be complete): Write-Host Get-Credential Read-Host It’s best to avoid cmdlets that may require additional input or which produce output to the screen while the script runs.
Scheduling the script (On Windows)
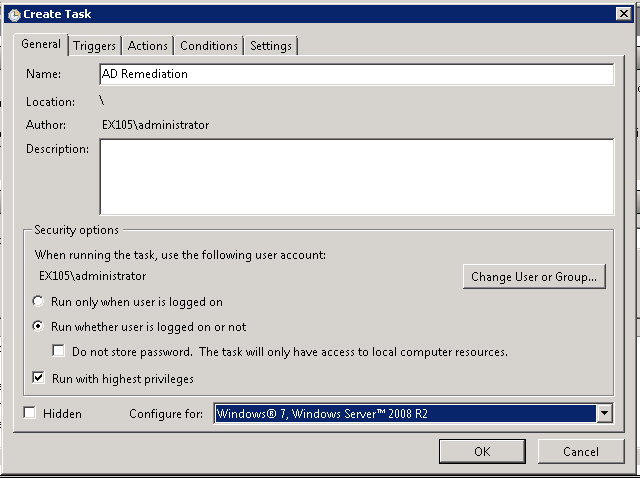
In order to schedule a script we need to open the ‘Task Scheduler’ on the server to run the script. Once open, we need to create a new task:

Once the New Task is open, we need to provide a Name, Description and potentially an account to run it under. If your script does fail, you may need to check the box that states ‘Run with highest privileges’:
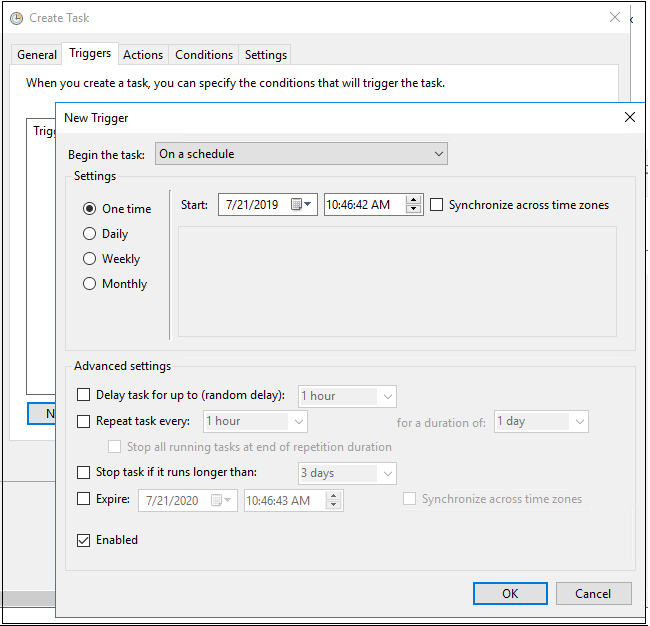
Then we need to proceed to the ‘Triggers’ tab which is the tab we use for actually setting the time for the script to run:
Once we have a schedule we need to add the script to the script to the scheduled task:
(Sample values) Program/Script – C:\Windows\System32\WindowsPowerShell\v1.0\powershell.exe Add arguments – -ExecutionPolicy Bypass -noprofile
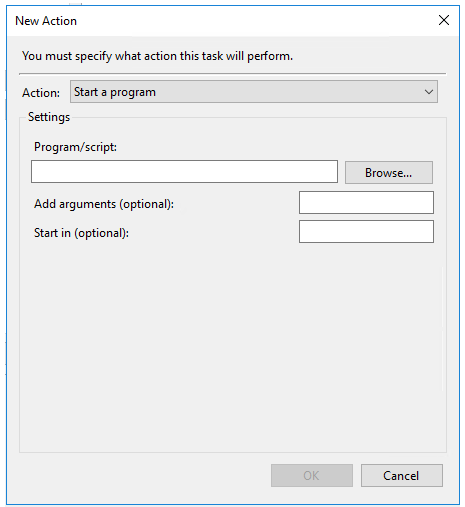
The other tabs for creating a task ‘Actions’ and ‘Conditions’ are optional and not required for scheduling a PowerShell script to run on an automated basis.
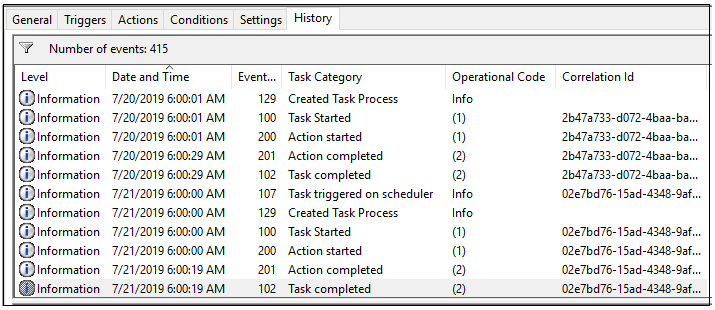
Once we get the script scheduled, the next step is to wait for the task to run. Then after it runs, check the task history as well as any logs/emails that were created while the task was running.